Introduction
Gather Your Tools
Before you begin cutting onions for kabobs, make sure you have the necessary tools on hand. These include a sharp knife, cutting board, and a peeler. A sharp knife is essential for making clean and precise cuts, while a cutting board provides a stable surface to work on. A peeler will help you remove the skin from the onion easily and efficiently.
The Importance Of Proper Onion Prep For Kabobs
Properly preparing the onions for kabobs is crucial for ensuring that they cook evenly and add delicious flavors to the dish. When the onions are cut into bite-sized pieces, they cook faster and become tender and sweet, complementing the other ingredients on the skewers.
To cut onions for skewers, follow these steps:
- Ensure that your knife is sharp to make clean cuts.
- Slice the onion in half lengthwise, then peel the skin off of each onion half.
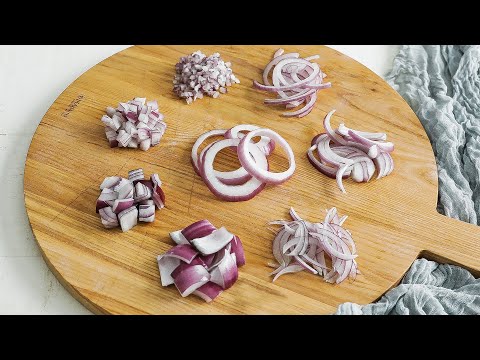
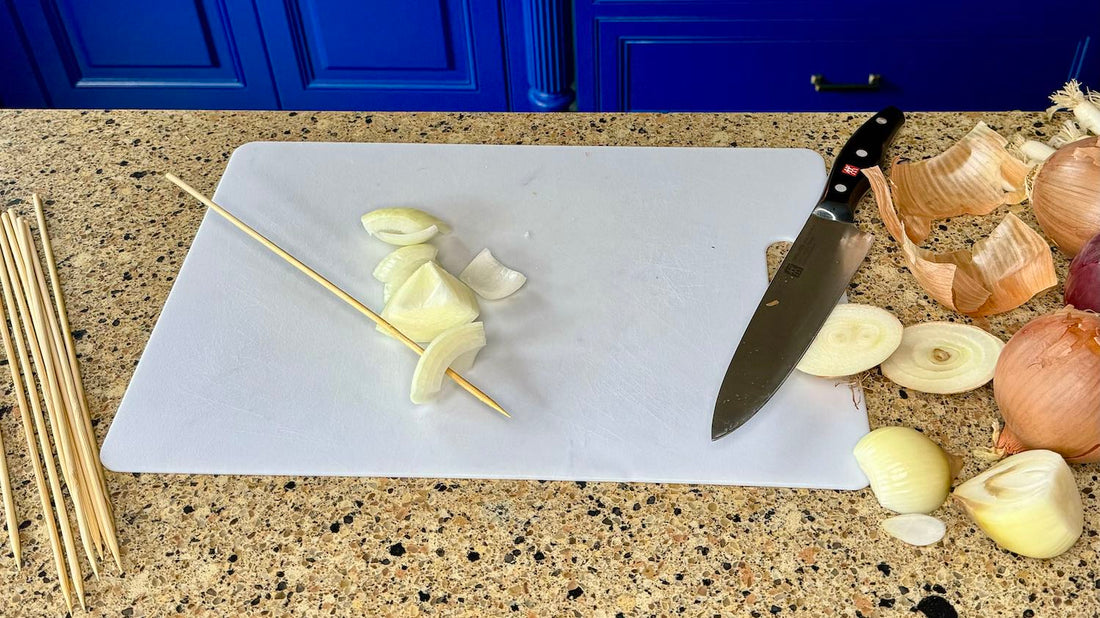
- Slice the onion halves into even bite-sized pieces.
- Keep the onion pieces relatively flat and uniform in size for even cooking.
Taking the time to cut the onions properly not only enhances the taste of your kabobs but also improves the overall presentation of your dish. Your guests will appreciate the effort you put into creating a visually appealing and delicious meal. So, grab your tools and get ready to master the art of onion cutting for kabobs!
Step 1: Peel The Onion
Tools Needed For Peeling
Before starting the process of peeling the onion, gather the necessary tools to make the task easier. You will need a sharp knife, cutting board, and a peeler. A sharp knife ensures clean and precise cuts, while a cutting board provides a stable surface. The peeler is useful for easily removing the outer skin of the onion.
Techniques For Gentle Peeling
To peel the onion, follow these techniques to ensure a gentle and efficient process:- Begin by making a shallow cut at the top and bottom of the onion.- Gently remove the skin by pulling it away from the onion.- Discard the outer layer, as it can be tough and not ideal for kabobs.- Continue peeling until you reach the desired layer of the onion.
Properly peeling the onion is the first step in preparing it for kabobs. By removing the outer skin, you eliminate any potential tough or unpleasant bits and allow for a more enjoyable dining experience.
Stay tuned for the next section, where we will cover the next steps in preparing the onions for kabobs.
Step 2: Trim The Ends
Importance Of Cutting Off Ends
To prepare the onion for kabobs, it is important to trim off the top and bottom ends. This step serves two main purposes:
- Creating a Flat Surface for Stability: By removing the ends, you create a flat surface that allows the onion to stand upright. This stability is crucial when slicing the onion into even pieces for skewering. Without a stable base, the onion may wobble or fall apart, making it challenging to achieve uniform cuts.
- Removing Potential Impurities: The ends of the onion can often be dry or discolored. Trimming them off ensures that only the freshest and tastiest parts of the onion are used in your kabobs. This also contributes to the visual appeal of the finished dish.
To trim the ends, simply use a sharp knife to cut off the top and bottom of the onion, creating a flat surface on either end. This will provide stability and ensure that your onion is ready for the next step in the preparation process.
Continue reading to learn about the next step in cutting onions for kabobs.
Step 3: Cut The Onion In Half
Benefits Of Halving The Onion
Cutting the onion in half serves several benefits:
- Easier Handling: By halving the onion, you make it more manageable to work with. It reduces the risk of the onion slipping or rolling while you’re slicing, improving safety.
- Consistent Sizing: Halving the onion allows for more control over the size of the slices. This ensures that the onions will be evenly cooked when threaded onto the skewers.
Proper Technique For Cutting In Half
To cut the onion in half:
- Place the onion with one of the flat ends created in the previous step facing downwards to provide stability.
- Position a sharp knife at the top of the onion, right at the center where the ends were trimmed off.
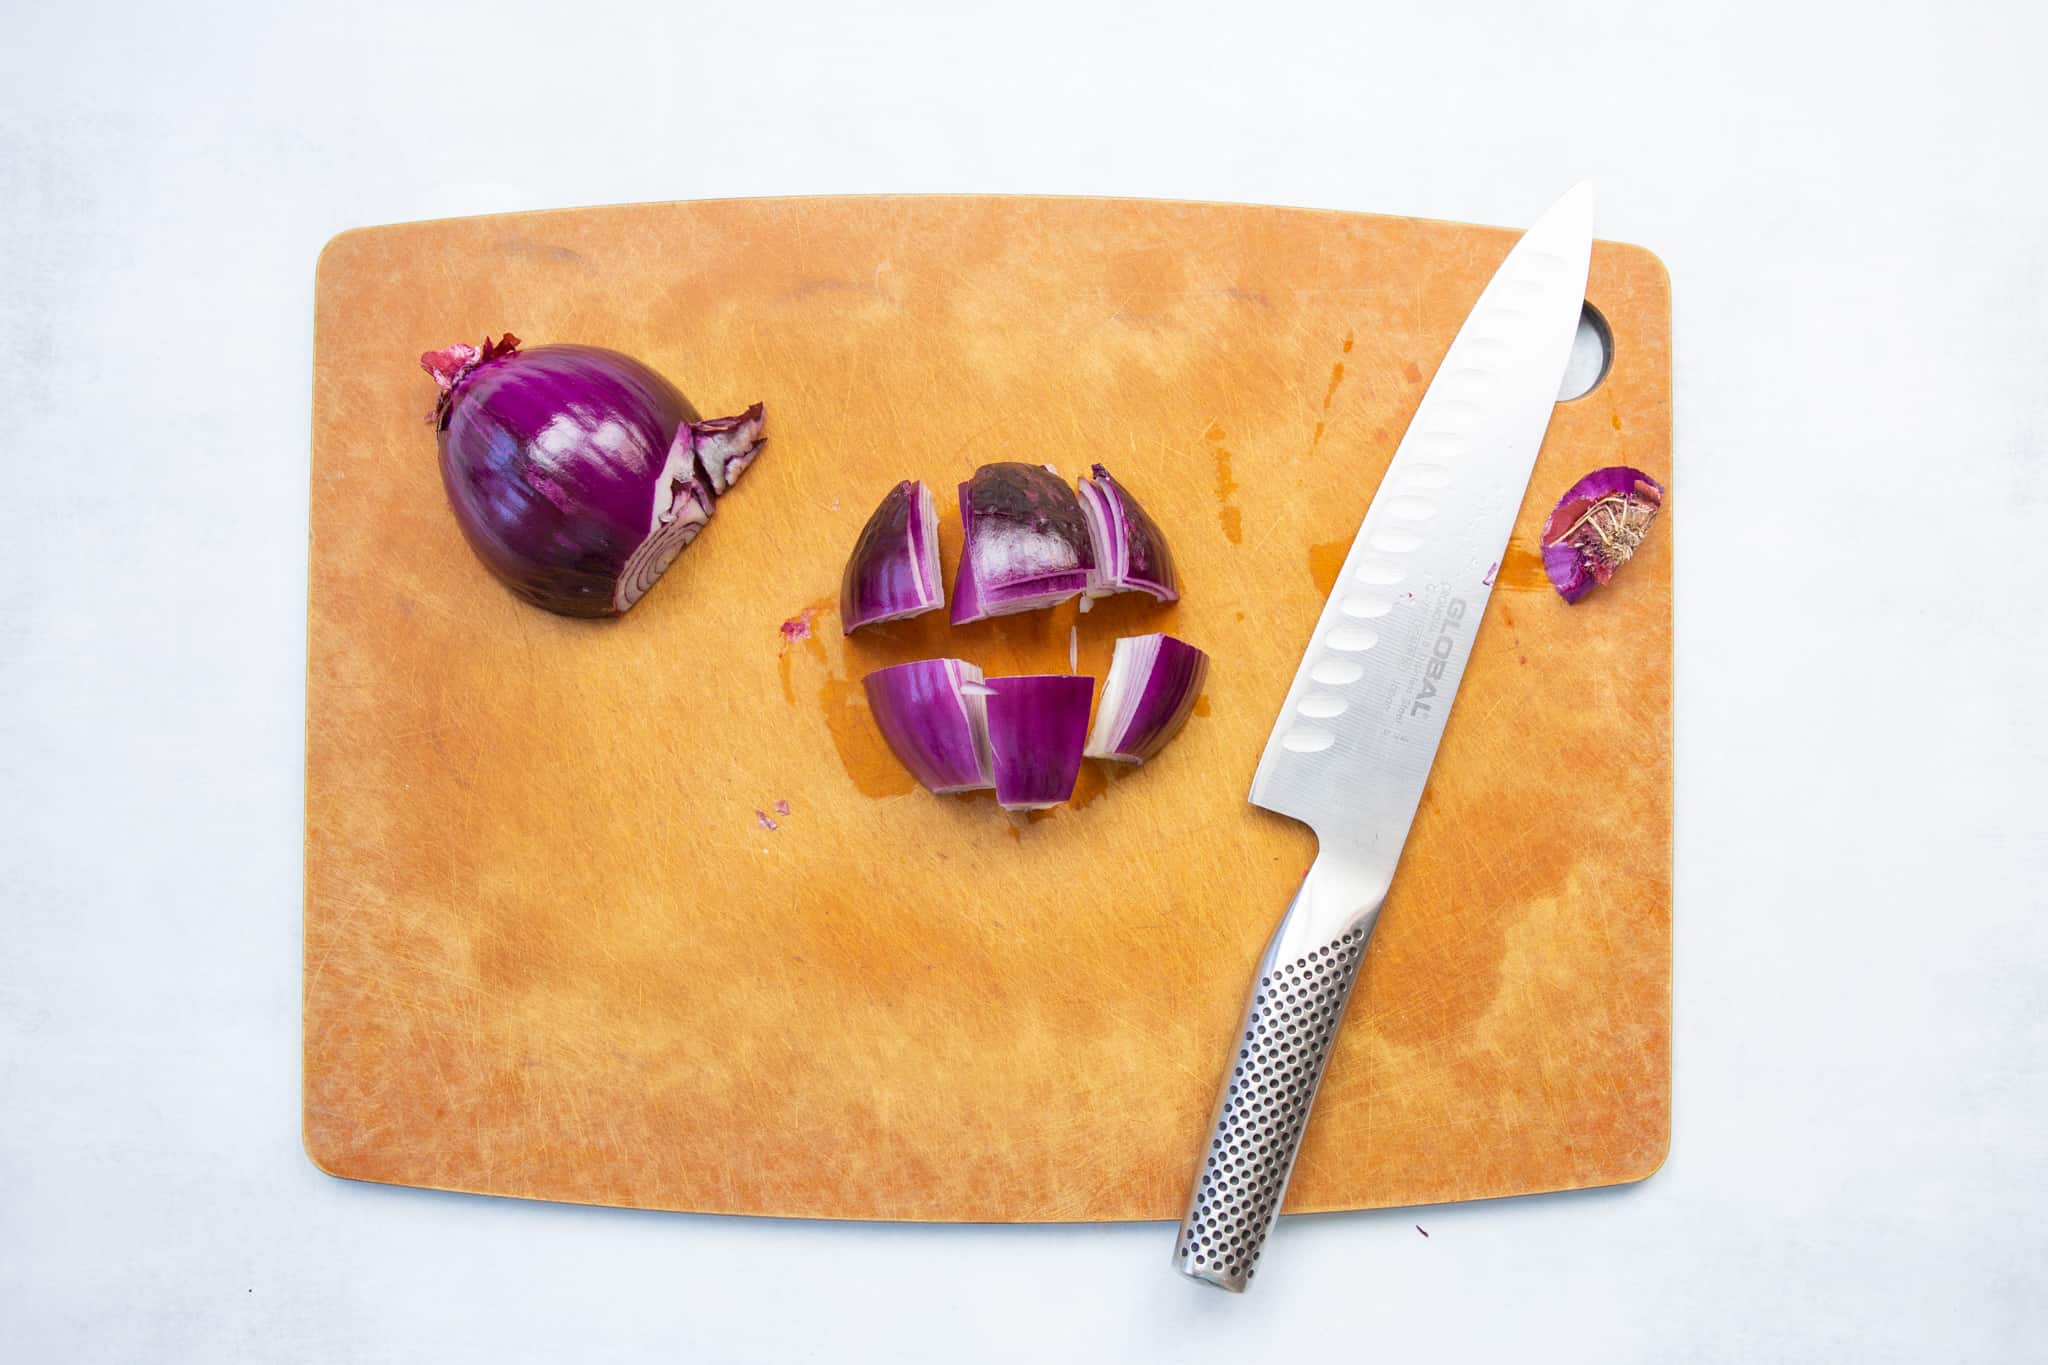
- Apply downward pressure and gently slice the onion in half from top to bottom.
When done correctly, you should have two halves of the onion, ready to be sliced into thin even pieces for your kabobs.
By following these steps, you will be well on your way to perfectly sliced red onions for your kabobs. Keep reading to learn about the next step in the process.
Step 4: Place Flat Side Down
Ensuring Stability On Cutting Board
To continue preparing the onion for kabobs, it is important to place the flat side down on the cutting board. This step serves two main purposes:
- Preventing the Onion from Rolling: By placing the flat side down, you ensure that the onion stays in place while you make the necessary cuts. This reduces the risk of accidents and makes the slicing process easier.
- Creating Even Slices: Placing the flat side down allows for more control and precision while slicing the onion. This results in more consistent and evenly sized pieces, which enhances the overall taste and presentation of your kabobs.
To place the onion correctly, place the onion half with the cut side down on the cutting board. This ensures stability and allows you to move on to the next step with ease.
Importance Of Flat Surface For Even Slicing
Before proceeding, it is crucial to emphasize the significance of having a flat surface when cutting the onion. This flat surface provides stability and prevents the onion from rolling, making it much easier to achieve precise and uniform cuts. By having all the pieces of the onion wedges the same size, they will cook evenly on the kabobs and enhance the flavor of your dish.Continue reading to learn about the next step in cutting onions for kabobs.
Step 5: Make Horizontal Slices
Tips For Safe And Controlled Slicing
To continue preparing the onion for kabobs, the next step is to make horizontal slices. Follow these tips to ensure safe and controlled slicing:
- Keep Your Fingers Tucked: When making the horizontal slices, keep your fingers curled in a claw-like position. This helps to protect your fingers from accidental cuts while slicing through the onion.
- Use a Sharp Knife: A sharp knife will make the slicing process much easier and safer. It allows for clean cuts and reduces the risk of slips or mishaps.
- Go Slow and Steady: Take your time while making the horizontal slices. This will help you maintain control over the knife and achieve even thickness throughout the onion slices.
Achieving Uniform Thickness
To achieve uniform thickness in your onion slices, follow these steps:
- Pay Attention to the Thickness: Try to make each horizontal slice of the onion with the same thickness. This consistency in thickness ensures that the onion pieces cook evenly on the kabob skewers.
- Use a Mandoline Slicer: If you have a mandoline slicer, it can be a helpful tool to achieve even slices. Set it to your desired thickness and carefully slide the onion across the blade.
- Practice Makes Perfect: The more you practice slicing onions for kabobs, the better you will become at achieving uniform thickness. With time, you will develop a feel for the right amount of pressure and speed needed to slice the onion evenly.
By following these tips and techniques, you will be able to make perfect horizontal slices and achieve consistent thickness for your onion kabobs.

Step 6: Avoid Cutting All The Way Through
Preventing Accidental Separation Of Onion Rings
To ensure that the onion rings stay intact on the skewers, it is important to avoid cutting all the way through the onion layers. Follow these tips to prevent the accidental separation of onion rings:- Use a gentle touch: Apply gentle pressure while slicing the onion to avoid cutting through the entire layer. This will help keep the rings connected and prevent them from falling apart.- Pay attention to the depth: Watch the depth of your cuts to avoid going too deep. Aim for slicing three-fourths of the way into the onion layer while leaving the bottom intact.
Maintaining Onion Integrity For Skewering
To maintain the integrity of the onion for skewering, take the following steps:- Handle with care: Be gentle while handling the sliced onion to prevent the rings from breaking or becoming loose.- Use skewers strategically: When skewering the onion rings, thread the skewer through the intact sections of the rings, ensuring they remain secure and do not slide around.
By following these tips and techniques, you will prevent the accidental separation of onion rings and maintain the integrity of the onion while skewering for kabobs. This will result in beautifully assembled kabobs with perfectly cooked onions in every bite.
Optional Step: Soak In Water
Benefits Of Soaking In Water
Soaking the onion in cold water for 5-10 minutes before cutting can have several benefits when preparing kabobs. These include:
- Reducing tears: Soaking the onion in water helps to reduce the tear-inducing compounds that are released when cutting into the onion. This can make the onion cutting process much more comfortable and tear-free.
- Enhancing flavor: Soaking the onion in water can also help to mellow its flavor, making it more mild and pleasant. This can be especially beneficial for those who prefer a less intense onion taste in their kabobs.
Preventing Onion Tear-inducing Compounds
When an onion is cut, it releases sulfuric compounds that can irritate the eyes and cause tears. Soaking the onion in water before cutting can help reduce the release of these compounds, minimizing the risk of tears. To soak the onion, simply peel and slice it, then place the slices in a bowl of cold water for 5-10 minutes. After soaking, drain and pat dry before using in your kabobs.
By soaking the onion before cutting, you can enjoy a tear-free onion cutting experience and a more mild flavor in your kabobs. This optional step can be skipped if you prefer the natural flavor of onions. So give it a try and see how it enhances your kabob preparation process.
Optional Step: Soak In Water
Benefits Of Soaking In Water
Soaking the onion in cold water for 5-10 minutes before cutting can have several benefits when preparing kabobs. These include:- Reducing tears: Soaking the onion in water helps to reduce the tear-inducing compounds that are released when cutting into the onion. This can make the onion cutting process much more comfortable and tear-free.- Enhancing flavor: Soaking the onion in water can also help to mellow its flavor, making it more mild and pleasant. This can be especially beneficial for those who prefer a less intense onion taste in their kabobs.
Preventing Onion Tear-inducing Compounds
When an onion is cut, it releases sulfuric compounds that can irritate the eyes and cause tears. Soaking the onion in water before cutting can help reduce the release of these compounds, minimizing the risk of tears. To soak the onion, simply peel and slice it, then place the slices in a bowl of cold water for 5-10 minutes. After soaking, drain and pat dry before using in your kabobs.
By soaking the onion before cutting, one can enjoy a tear-free onion cutting experience and a more mild flavor in the kabobs. This optional step can be skipped if the natural flavor of onions is preferred. Give it a try and see how it enhances the kabob preparation process.
Frequently Asked Questions: How to Cut Onion for Kabobs: Perfecting Onion Prep for Skewers
Q: Why is it important to know how to cut onion for kabobs?
A: Knowing how to cut onions for kabobs is essential for several reasons. Properly prepared onions can enhance the flavors of your kabobs, add a delightful crunch, and help bind the other ingredients together on the skewer.
Q: What are the best onions to use for kabobs?
A: The best type of onion to use for kabobs is usually a sweet onion. Sweet onions, such as Vidalia or Walla Walla onions, have a milder flavor compared to other onions, making them more enjoyable to eat when raw or lightly cooked. However, you can also use red or white onions if you prefer a stronger onion taste.
Q: Should I peel the onion before cutting it for kabobs?
A: Yes, it is important to peel the onion before cutting it for kabobs. Simply remove the outer dry skin and any papery layers. This helps to eliminate unwanted debris and ensures a clean presentation.
Q: How do I cut the onion into uniform pieces for kabobs?
A: To cut the onion into uniform pieces for kabobs, follow these steps:
- Begin by cutting off both ends of the onion to create a flat surface.
- Stand the onion upright on one of the flat ends.
- Cut the onion in half through the root end, creating two halves.
- Slice each half into evenly-sized wedges, about 1/2 to 3/4 inch thick.
- Separate the onion layers, making sure they are fully separated and can be easily threaded onto the skewer.
Q: Can I use a different shape than wedges for my kabob onion?
A: Absolutely! While wedges are a popular choice, you can also cut the onion into chunks or even leave them as whole rings if you prefer. However, keep in mind that the smaller the pieces, the quicker they will cook on the grill or in the oven.
Q: How do I prevent the onion from falling apart on the skewer?
A: One way to prevent the onion from falling apart on the skewer is to use two skewers instead of one. By threading the onion pieces through two parallel skewers, you create a more stable base that will keep the onion intact during grilling or cooking.
Q: Are there any tips for storing cut onions for kabobs?
A: If you need to store the cut onions for kabobs, it is best to keep them refrigerated in an airtight container or wrapped tightly in plastic wrap. They can be stored for up to two days, though it’s recommended to use them as soon as possible for the best flavor and texture.
Q: Can I pre-cook the onions before skewering them for kabobs?
A: While it is not necessary to pre-cook the onions before skewering them for kabobs, some people prefer to lightly grill or sauté them to soften their texture and bring out their natural sweetness. This step is optional and depends on your personal preference.
Q: Any additional tips for cutting onions for kabobs?
A: Here are a few extra tips to remember when cutting onions for kabobs:
- Use a sharp knife to make clean cuts and reduce any chance of crushing or damaging the onion.
- If you’re a beginner, consider slicing the onion while keeping the root intact. This will help hold the layers together and make it easier to cut uniform pieces.
- Always exercise caution when handling a knife and keep your fingers away from the blade.
- Enjoy the process and take your time to ensure each piece is cut to your desired size and shape.
Remember, perfecting the art of cutting onions for kabobs not only enhances the aesthetics but also adds to the overall enjoyment of your meal. Experiment with different shapes and techniques to find what works best for your taste and presentation preferences. Happy kabob making!

Jake’s Street Food is a culinary gem located in the heart of the Submarine Museum area, offering a delectable array of tasty delights for locals and visitors alike. Whether you’re exploring the historic sites of Pearl Harbor or taking a shuttle to the USS Missouri or Pacific Aviation Museum, Jake’s Street Food is the perfect pit stop to refuel and indulge in the best food the area has to offer.
Our journey began with a passion for creating mouthwatering dishes that celebrate the vibrant flavors of local and global cuisine. Drawing inspiration from the bustling streets of culinary capitals around the world, Jake’s Street Food brings a fusion of bold flavors and innovative twists to classic street food favorites.